
Chapter 8
Cleaning Different types of windows
Cleaning French Windows
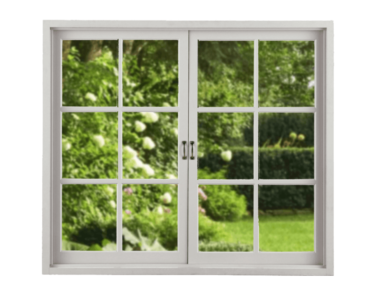
"French windows" is a term that generally applies to windows and doors that have anywhere from four to fifteen or more small panes of glass and may extend down almost to the floor. Some window cleaners refer to these as "cut-ups".
(One section of glass "cut-up" into many pieces.)
A French window that has a full solid frame between each piece of glass is called a "True Divided Light". This means there are individual panes of glass set in each section of the frame. You can typically see the metal separator between the glass.
Some grids are held to the glass by adhesive strips or are built with one large piece of glass and have a plastic or wood grid fixed in place over the glass in order to give the effect of French windows.
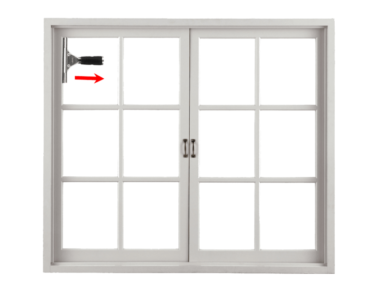
Regard it as any other window. The procedures are the same for most of it. Squeegeeing the glass horizontally gives the best results since it reduces the runners.
You can get good results on these windows with your small squeegee.
Starting at the top, wet a row or two at a time. Go row by row! Avoid drowning the glass with the solution, It will cause runners.
Consider using a sponge to wet the glass instead of the scrubber.
Quick-wipe, lightly, the whole pane of glass before you start to squeegee it.
This will remove any excess solution.
Then simply horizontally squeegee the glass on each individual cut-up section.
Wipe the cross piece at the bottom of each row as you finish it. This will help prevent the excess dirty solution from running down on the pane below.

Do not remove too much solution when you quick-wipe. If the solution is too thin or completely removed, you will get streaky glass when you squeegee.
You will find removable grids on some windows. Most grids are held in with pushpins. These are not always easy to release.
Some are held in with clips, screws, or spring clips. Be careful you do not bend or break the pins or tabs by trying to force them back into position.
When the grids need cleaning, either dust or wash them and wipe them as much as possible while they are in place before you remove them. Be careful with all grids. They are fragile!
Cleaning Tempered Glass
Tempered "safety" glass is glass that has been heat-treated so when it breaks it results in many pea-sized pieces. This has greatly reduced injuries from broken glass. Since about 1980, tempered glass has been installed in many places where there is a possibility of people falling through the glass and injuring themselves.
Tempered glass will squeegee like regular glass, you will never notice the difference!
In some cases, the glass can be very easily scratched. It's wise to test cautiously before using a scraper for spot removal on any glass. Some tempered glass will scratch easily on one side and not on the other side.
It is best to use only a non-abrasive scrubby pad on tempered glass. Razor blades can scratch the glass.
Be very cautious with all of your windows until you know which ones you can scrape without resulting in scratches! Varieties of solvents that will remove paint spots without any damage to the glass are available at the hardware store.
Caution
Some tempered glass will scratch easily with a razor blade. Test for scratching in an inconspicuous part of the glass. If it scratches easily, lifts spots using solvents. Do not push them around with a razor.
Do not use steel wool or other abrasives on tempered glass, it can cause scratches!
All glass can be scratched by a rusty razor blade.
When in doubt as to whether the glass is tempered or not, do not use a razor scraper on it.
Cleaning Solar-Filmed Windows

Solar, or darkening, film has become increasingly popular since about 1985. It comes in varying degrees of darkness. The film cuts the brightness of the sunlight streaming through the window.
The film is installed on the inside of the window.
Solar film is a plastic darkening film that is installed by wetting the window with a soapy solution and applying the film to the glass. The film is then wet on the side facing the inside of the house.
Then the entire surface of the newly applied film is squeegeed so the solution is removed from between the glass and the film to eliminate any air bubbles under the film.
After the squeegeeing process is finished, the film is then cut to fit as close to the edge as possible. Most of the time, you cannot detect the edge.
How can you tell if you have a filmed window? Sometimes it is obvious, but not always. If you are not sure that the window has film, check to see if the view is darker by looking through the window and compare it to looking through an open window.
If you are in doubt about whether or not the glass has film, treat the window as if it does have film and note the cautions below.
Caution
Any kind of scrubby pad or steel wool will scratch the window film. You will not be able to remove the scratches.
Use plenty of cleaning solution so the squeegee does not drag on the film and scratch it.
Apply less pressure to the squeegee, but enough to remove the dirty solution.
Do not use ammonia, alcohol, or vinegar on filmed windows. It will damage the film.
Never use a razor blade on the film to remove spots.
Do not use any kind of solvent on the film.
Thoroughly rinse out your scrubber before you put it in the solution. Dirt in the scrubber will scratch the film.
Cleaning Mirrors

Cleaning mirrors is almost the same as cleaning regular glass but there is a twist to this procedure. Since the edges of the mirrors are not sealed, you will need to catch the dirty solution as you squeegee horizontally. Do not squeegee to the very edge of a mirror frame.
The solution may absorb into the wood and lift off the finish. Quick-wipe most of the excess solution from the mirror before making the final pass downward.
Catch the dirty solution at the bottom of the mirror as you squeegee it so it doesn't run into the frame. Finish it by wiping the frame dry.
Be careful when cleaning large mirrors that have light fixtures, plug receptacles, and switches located in the mirror, such as in a bathroom. Do not let any solution dribble down behind the covers. It will create an electrical hazard. Quick-wipe around the fixtures before squeegeeing near them. Catch the squeegeed solution as you make the pass above the fixtures.
Do not worry about what you miss while working around the fixtures.
After you have wiped all of the dirty solution off the mirror, go back with dry towels and buff those areas clean.