
Chapter 9
Extension Poles

Extension poles help you to get to the high windows or the ones that are not easily accessible with a ladder.
They come in varying sizes and have telescoping sections. These poles will adjust to any length within their minimum to maximum length.
It takes strength and practice to keep the squeegee in proper contact with the glass and to be able to draw it down in a straight line. Keep in mind you will be standing away from the house and will require a greater pole length than the vertical height of the window.
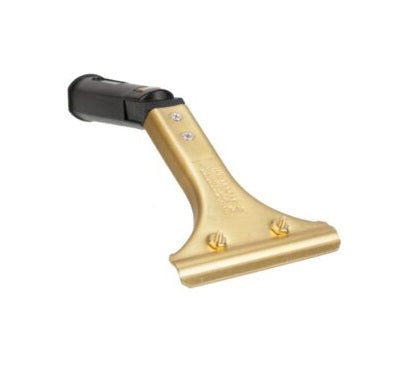
With an extension pole, you can attach any of your traditional tools such as squeegees, scrapers, or any other window cleaning accessories.
If you want to learn more about extensions poles beyond the basics, check out our Extension Pole Guide.

Extension Pole Anatomy
The pole begins with the pole tip and the section it’s connected to; that is section one. The next section after that is section two, and then section three, all the way down. The first collar, which is connected to section number two, is often called either the small collar or the number two collar. The next collar, which is on the three-section, is called the number three collar or the large collar, and it works its way down from there.
If a part of your pole breaks, most parts are replaceable, so you won't have to replace the entire pole.
There are two main types of locking mechanisms, external locking collars, and internal locking collars. Adjustments are made to external locking collars by loosening and tightening the collars that are on the outside of the pole.
The locking mechanism for internal locking poles is inside the pole, which means the pole is free of collars. The exterior of the pole is therefore smooth when handling and won’t catch.
-
Cleaning with an Extension Pole
Option 1
The best way to "cut-it-in" is with a swivel squeegee.Quick-wipe the edges of the glass. Then position yourself slightly to the side of the window you will be cleaning: to the right if you’re right-handed; to the left if you’re left-handed.
You have to be "ahead" of the direction of travel of the squeegee to have the proper leverage to do this.
With the swivel squeegee turned so that the channel is in the vertical position and only about 1" (2.5 cm) of squeegee rubber contacting the glass at the top, pull the squeegee across the glass. This will take a little practice to do it easily on a consistent basis. You are now ready to squeegee the glass. This procedure gives the best results.
Option 2
In this procedure, quick-wipe, then "cut-it-in" by placing the squeegee at the very top of the glass. Tilt the end of the squeegee that touches the side of the frame until it is approximately 1" (2.5 cm) lower than the top edge of the frame.
Draw the squeegee horizontally on the glass from one end to the other while maintaining full contact between the squeegee rubber and the glass.
When you have come to the end, bring the squeegee down and wipe the squeegee rubber before making the first pass down the glass. Dry your squeegee rubber after each pass.
Option 3
In this procedure, quick-wipe, then "cut-it-in" at the top by placing the squeegee on the glass at the top edge of the frame and pulling it down about 1" (2.5 cm). Do this all across the top, wiping the squeegee rubber each time. Then squeegee the glass.
This procedure is the least effective and usually will leave spots. The spots can be removed with a towel or steel wool after they have dried.
After you have finished the squeegeeing process and the glass and frame are dry, (this may be 30 minutes) it will probably be necessary to buff along the top edge to remove spots of dried solution.
-


What if the exterior windows are set back in the frame or have an extended sill?
The standard squeegee will probably not be able to squeegee down to the bottom of the glass without the pole hitting the sill. To reach the bottom of the glass in these cases, use the Ledger™ squeegee handle.
This gives you the extension over the sill that is needed for the squeegee to reach the bottom of the glass without the pole hitting the sill.
The Ledger™ handle is positioned at a different angle from the regular squeegee that is normally used. The squeegee channel and rubber will still have to be at the proper angle in order to work.
With one hand, place your regular squeegee on the glass at the proper angle. With the other hand, place the Ledger™ handle next to it and adjust the angle of the handle until the channel is in the same position as the standard squeegee handle channel.
This will match the angle of contact of the squeegee rubber that is required for the proper removal of the dirty solution. Maintain this position of the Ledger™ when using it on a pole.
It is easy to adjust to the Ledger™ when using a pole. Just stand closer to the window. In order to have the proper angle of contact for the squeegee rubber, you will find yourself standing only a few feet from the house underneath the window.


